Using Node Attachment Editor
The attachment editor used in Mindmap is one of the best online editor out there. Infact you might
want to use it as an online note taking tool or as word processor. I have preferred for filling in more features than keeping it light weight. As such, it is quite bulky in size. On the other hand
once the files are loaded into your browser it should be loaded from there for subsequent usage, making it available sooner in the next session. Please let me know in the feedback should I go for a light weight option or
adding more features into it.
Basic Features
Most buttons in the toolbar are self explanatory. The top row has basic buttons you always find on a basic word processor.

All the buttons are self explanatory. Note that the first button, 'save' button is optional. Mindmaps automatically saves your work when you close the editor. There is no need to use the 'save' button.
'New' document in this context clears all the content of the editor. It won't create another document. It can be used to delete an attachment of a node.

On to the second row, the above buttons are all self explanatory. It does what it says.

These three buttons are used to insert links to other webpages. Anchor links are links within the document. For instance, if you have a large document with many subsections like 'introduction' and so on, you might
want to put anchor links on top of page to go to that subsection directly without scrolling.

All the above buttons are helpful and has some neat functions. First button lets you insert maths equations into the document. Follow the wikipedia link to know more about the equation format and using it.
Embedding Videos
Next button lets you embed videos or other rich content from other websites. You can embed youtube videos to your document. It supports contents from sites like YouTube, Flickr, Qik, Vimeo, Hulu, Viddler, MyOpera, etc.
Simply paste the content url and resize it according to your needs. For instance, to embed a youtube video, paste the youtube url which is in the format, http://www.youtube.com/watch?v=xxxxxx
Adding Images
Next button, lets you insert enhanced image. It brings up the image dialog.
Insert the url of image you want to use. You can also add a caption to this image by checking 'Captioned image' option. One good feature of this tool is that it lets you resize or re-position image on the fly.
![]()
One common way of getting the url of an image from a website is to right-click on the image and click 'copy image url'.
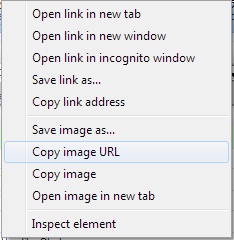
Warning: The online image you use could have been copyrighted the owner. Use it wisely.
Note: If you use an url to insert an image to your document, it is not stored as a part of the mindmap document. The image is still outside and as long as the url is valid, the image will be shown. To
import an image and store it as a part of mindmap file, use the next tool described below.
Another way to import image to your document is to use the 'image' tool, 
It brings up the image dialog.
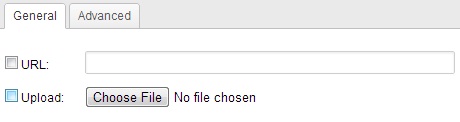
Use 'choose file' to select a image file from your computer and insert it into the document. This way the image file is stored as a part of the mindmap file.
One tip is to use images lesser in size to lessen the size of the mindmap file especially if you have large mindmap with many images. For instance, .bmp files are comparatively larger than .jpg or .png files.
You can use image processing programs to lessen the size.
You can also use an image URL to import it into the document. But as stated before, in this the image is not stored as part of the mindmap file.
Other buttons are self explanatory. Use 'Insert Code Snippet' tool to insert code fragments with the correct syntax-wise formatting. Use 'Flash' button to import a flash object.

On to the last row, I think all buttons are self explanatory. It does what it says, :)